How to Correctly Map Metafields Between NetSuite and Shopify?
Mapping custom Metafields between NetSuite and Shopify allows seamless integration of additional product details into your Shopify store from your NetSuite ERP system. This guide will walk you through the process of setting up and ensuring accurate Metafield mapping using our Robust NetSuite Integrator app.
Step-by-Step Guide to Map Metafields
Step 1: Create Custom Metafields in NetSuite
- Action: First, define the custom Metafields in NetSuite that you want to synchronize with your Shopify store. This can include unique product attributes, additional specifications, or any other product-related data that are not part of the standard fields.
Step 2: Access the Robust NetSuite Integrator App
- Action: Log in to your account where the Robust NetSuite Integrator app is installed.
- Navigate: Find and enable the toggle for "List Product from NetSuite to Shopify" if it's not already active.
Step 3: Configure Settings for Product Listing
- Action: Click on the settings icon corresponding to the "List Product from NetSuite to Shopify" feature.
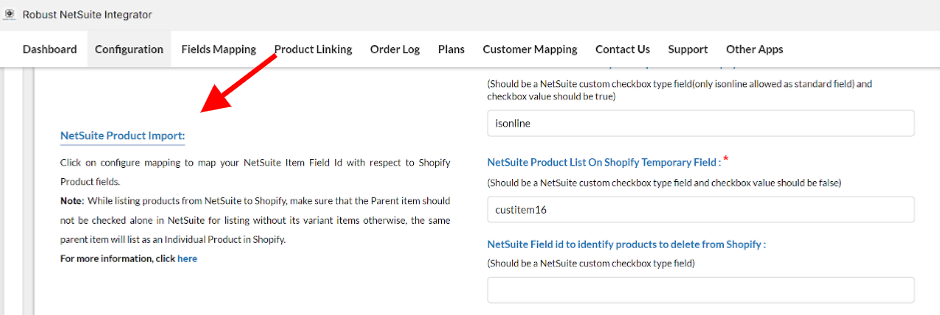
- Navigate: This action will direct you to the "NetSuite Product Import" settings page.
Step 4: Configure Product Meta Field Mapping
- Action: Look for the option labeled "Configure Product Meta Field Mapping" within the settings page.
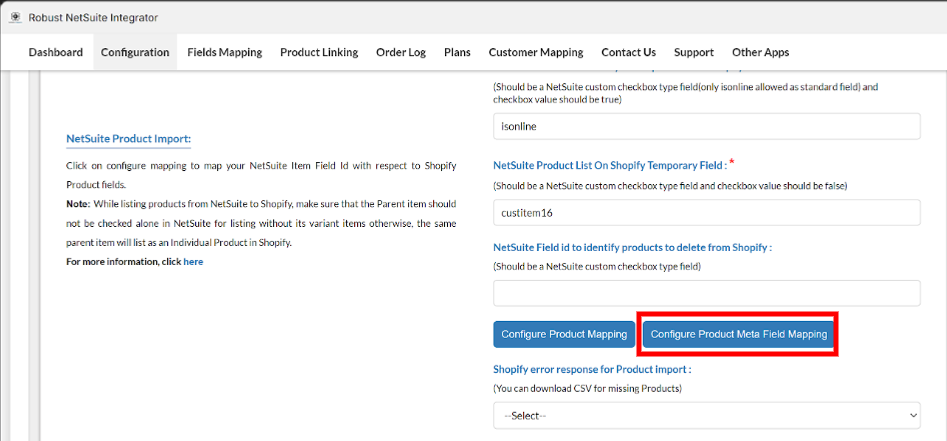
- Open Mapping Dialog: Click on this option, and a dialog window will open, allowing you to map the Metafields.
Step 5: Map Metafields
- Action: In the dialog window, match each NetSuite Metafield with the corresponding Shopify Metafield. Ensure that you select the correct Metafield type (e.g., string, integer, boolean) for each item to ensure data is handled correctly during synchronization.
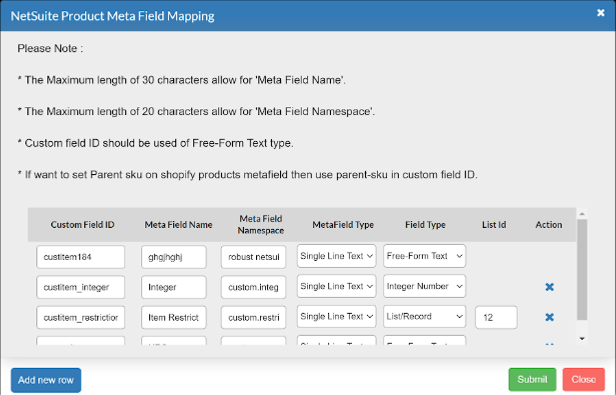
- Validate: Double-check each mapping to ensure accuracy. Incorrect mappings can lead to improper data display on Shopify or integration errors.
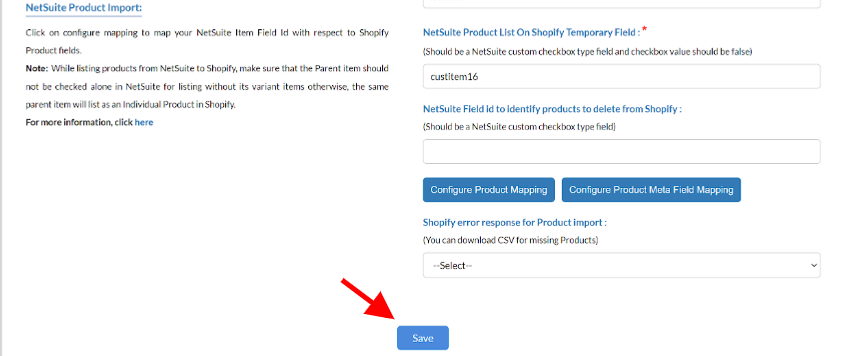
Step 6: Save and Test
- Action: After configuring the mappings, save your settings.
- Test: Conduct a test by importing a product from NetSuite to Shopify to verify that the Metafields appear correctly on your Shopify store.
Best Practices and Tips
- Regular Updates: As your product offerings evolve, regularly update and review your Metafield mappings to ensure they remain relevant and accurate.
- Documentation: Keep a record of all mapped Metafields and their types. This documentation will be useful for troubleshooting and for training new team members.
- Monitor Integration Logs: Regularly check integration logs for any errors or warnings related to Metafield mappings. This can help you catch and resolve issues early.
- Consistent Naming Conventions: Use consistent naming conventions for Metafields in both systems to avoid confusion and simplify the mapping process.
Conclusion
By adding more appropriate details to product listings, and properly mapping Metafields between NetSuite and Shopify with the help of the Robust NetSuite By taking the above-mentioned actions, you can make sure that data moves between the two platforms with ease, preserving consistency and integrity between your eCommerce and ERP systems.
In case, you have any questions OR need some assistance, you can always reach out to us at help@webbeeglobal.com
Related Articles
How to map your Shopify currencies with your NetSuite currencies using Robust NetSuite integrator?
If you are interested in mapping your Shopify currencies with your NetSuite currencies, please follow these below-mentioned steps. Step 1: Open your NetSuite account, and from the top-navigation pane, hover over to the Setup > Company > Enable ...Robust NetSuite Integrator: How to sync Shopify customer metafields to a NetSuite sales order?
If you are interested in syncing some of your Shopify order values including its metafields to your custom NetSuite fields in a conditional way, please follow the below-mentioned steps. Shopify Order JSON Before we move ahead to the mapping of a ...How to map a Shopify shipping method with its respective NetSuite shipping method using Robust NetSuite Integrator?
Step 1: Inside NetSuite, from the top navigation pane, please go to the Lists > Accounting > and click on the Shipping Items. Below is a screenshot to help you understand this visually. Step 2: COPY that shipping method internal ID which you want to ...How to map SKUs and synchronize inventory between your NetSuite account and Shopify store using Robust NetSuite Integrator?
Step 1: Inside Shopify, from the left navigation pane, please go to the Products, and click on any of your products. Below is a screenshot to help you understand this visually. Step 2: Copy the SKU of this above-clicked product. Below is a screenshot ...How Robust NetSuite Integrator syncs SKUs between your Shopify store and NetSuite account?
Once, you have (mapped/selected) the appropriate NetSuite SKU field inside the integrator following this step-by-step guide, our integrator will start mapping SKUs between your Shopify store and NetSuite account automatically, considering the fact ...